Caravan Water Damage and Delamination: How to Spot It in 10 Minutes

Ask anyone who has bought a few used caravans what they check first, and you'll get the same answer: water. Not the taps — the walls. Water that has found its way inside a van and stayed there is the single problem buyers fear most, and for good reason: it works quietly, it hides behind linings and under floors, and by the time it announces itself it has often been at work for years.
The good news is that water leaves evidence, and you don't need to be a professional to find most of it. Ten focused minutes with your nose, your eyes and your hands will tell you more about a van's history with water than an hour of reading the ad. Here's how to spend them.
Why water is the one to take seriously
A caravan is a house that gets earthquake-tested every time you tow it. Every kilometre of corrugated road flexes the body, and every join, seam, window, hatch and roof fitting is a place where two materials meet and move against each other. The sealant that keeps those joins watertight is doing a hard job in harsh conditions — Australian UV ages it, movement cracks it, and time beats it eventually no matter who built the van.

That's worth saying plainly, because water damage is often read as a verdict on the builder. Mostly, it isn't. It's the nature of a vehicle that lives outdoors and works for its living. Sealant is a maintenance item, like tyres — the difference between a dry van and a wet one is usually not who made it, but whether someone kept up with resealing before water got past it.
Once water is inside, though, the materials it reaches matter a great deal — which brings us to the word that stops buyers in their tracks.
What delamination actually is
Most modern caravan walls are a sandwich: a thin outer skin, a core (foam or ply), and an inner skin, bonded together into a single stiff panel. That bond is what makes a light panel strong. Delamination is the bond letting go — the skin separating from the core, so the sandwich becomes loose layers.
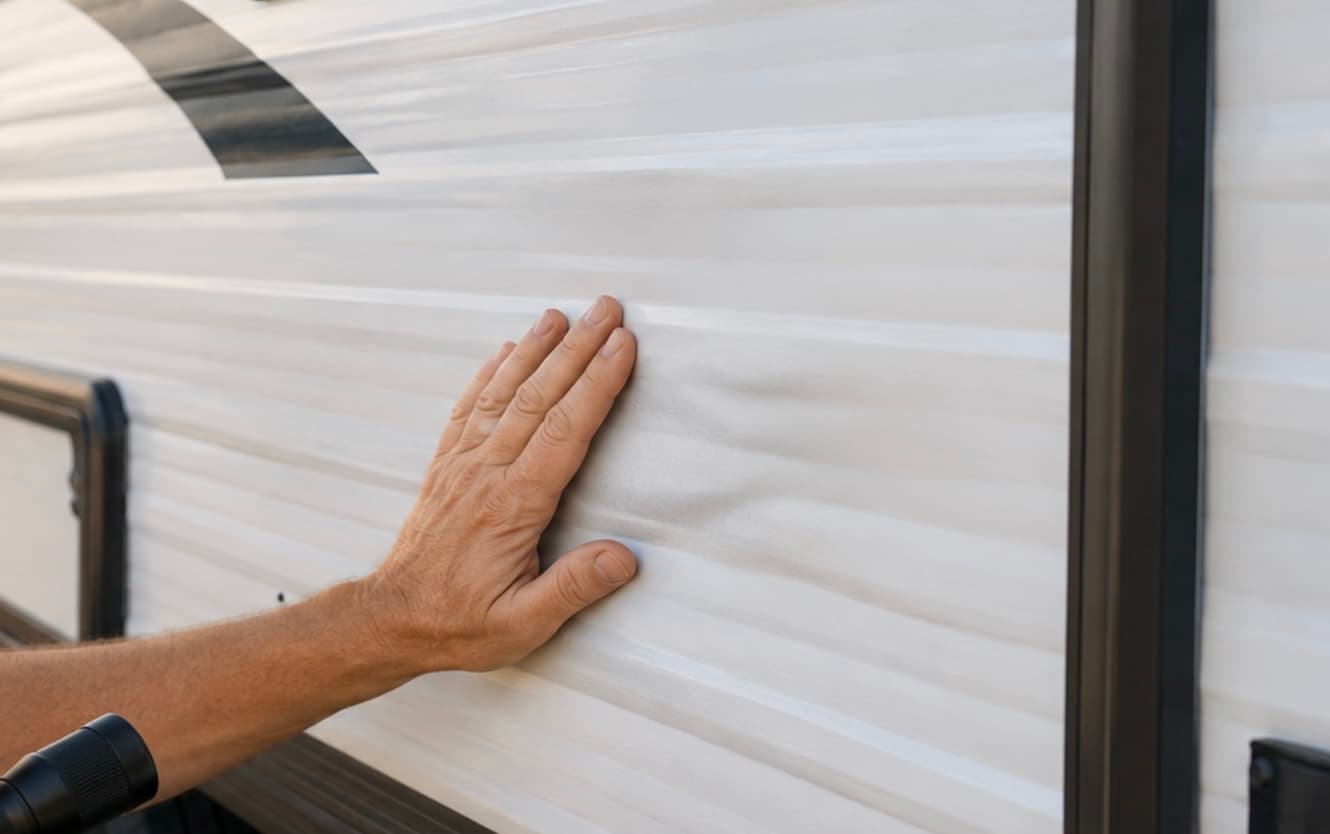
Water is the usual cause. It gets into the core through a failed seal or an unsealed screw hole, the core swells or the adhesive lets go, and the skin lifts. From outside you see it as bubbling, rippling or a soft bulge in a wall that should be flat. Pressed gently, a delaminated section feels spongy where the panel around it feels solid.
Older and traditionally built vans use a timber frame with aluminium cladding instead. They don't delaminate the same way — instead, the frame itself rots. Different word, same story: water got in and stayed.
Neither is automatically the end of the conversation. Small, dry, historic damage is a very different thing from active, spreading damage. The job of your ten minutes is to tell one from the other.
The 10-minute check
Do this in order. Each step feeds the next.
Minute one: the nose
Open the door and stand in the doorway before you touch anything. A van that has been closed up should smell stale at worst. Musty, damp or earthy is a different smell, and it is remarkably hard to fake your way past — deodorisers and air fresheners in a van that's for sale are worth noting, not ignoring. Your nose finds mould before your eyes do.
Minutes two to four: the ceiling and the roof line
Water obeys gravity, so start at the top. Inside, look at the ceiling edges, around every vent, hatch and light fitting, and along the tops of walls and cupboards — the classic path is water getting past a roof seal and running down inside the wall lining. You're looking for staining, watermarks like tide lines, bubbled or sagging lining, and screws with rust rings around them.
If you can safely get eyes on the roof (a small step ladder is the most underrated inspection tool there is), look for cracked, lifted or crazed sealant around anything that penetrates the roof — aerials, air conditioners, vents, solar mounts — and marks where water has ponded.
Minutes five to seven: windows, walls and lockers
Work down. Check the corners of every window inside — staining in the lower corners is the tell. Press the walls around window frames and along the bottom edge of the walls with the flat of your hand: solid is good, soft or spongy is not. Outside, sight down the walls in the light, looking for bubbling or ripples in the skin.
Open every locker and cupboard, especially the ones you have to kneel to reach. Look at the back walls where they meet the van wall, and lift anything stored in there. Under-bed storage is prime territory — mattresses hide a lot.
Minutes eight and nine: the floor
Walk the whole floor slowly, on your heels, corner to corner — not just the walkway. A soft spot underfoot near the door, the shower or the front boot wall is exactly the finding you're doing this to make. Lift the corners of any loose floor covering if the seller allows.
Minute ten: the question
Then ask, directly and kindly: "Has the van ever had water in it — and what was done about it?" An honest yes, with a story about when it was found, who repaired it and what they did, is genuinely reassuring — it means someone caught it and dealt with it. A vague no from a seller whose van smells like a forest floor tells you something too.
Reading what you found
Likely fine, and normal for age: tired but intact sealant, a single small historic stain that's bone dry, surface condensation marks in a van that's been shut up, sealant that's clearly been professionally renewed (neat, even beads are a good sign, not a cover-up).
Worth a professional opinion before you commit: one soft spot, staining in more than one place, any bubbling in the external skin, a musty smell you can't find the source of.
Serious: soft floor sections, walls that flex under gentle pressure, widespread staining, visible mould across surfaces, active drips or wet material. Repairing structural water damage properly means opening panels, replacing core or frame, and resealing — skilled work that has to be priced by someone who can see the van. It can absolutely be done, and done well, but you want to be choosing it with open eyes, not discovering it after handover.
A documented, professionally repaired leak is not a reason to walk away. An undisclosed one you found yourself is a reason to slow right down — not necessarily because of the damage, but because of what it says about what else might not have been mentioned.
When to bring in the professionals
If a van passes your ten minutes and you're getting serious, a pre-purchase inspection is cheap insurance against the most expensive class of surprise. Professional inspectors carry moisture meters that read what's inside a wall without opening it — the one instrument that settles a "is this damp or just cold?" argument.
Dedicated leak-testing services exist too. Repairers like A Grade Caravan Repairs in Melbourne run purpose-built caravan leak-testing systems that pressure-test a van for water-tightness — the kind of service worth knowing about both before a purchase and as periodic peace of mind on a van you already own. You can find caravan repairers on VANTURE's services directory, including specialists in leak detection and water damage repair.
And if the van is a pop-top or camper trailer, canvas adds its own water story — mould from being packed away damp is its signature problem. Our camper trailer inspection guide covers canvas in detail, and you can browse pop-tops for sale with your new inspection habits ready to go.
The bigger picture
Water damage sits at the top of the inspection list, but it's one item on it. Our first-time buyer's checklist — 27 things to do before you sign walks the full inspection, paperwork included, and a PPSR check makes sure the van's finances are as dry as its walls.
Ten minutes, a torch, a step ladder and a direct question. That's most of what stands between you and the used-van buyer's worst surprise — and it's entirely in your hands.
Looking at used vans this month? Browse used caravans for sale on VANTURE — and when one passes the smell test, find an inspector or repairer near you before you sign anything.
Thinking of selling? Sell your caravan on VANTURE — free to list, same price whatever it's worth, and no commission ever.
List your caravan free