Caravan Chassis Rust and Cracks: What's Cosmetic and What's a Walk-Away

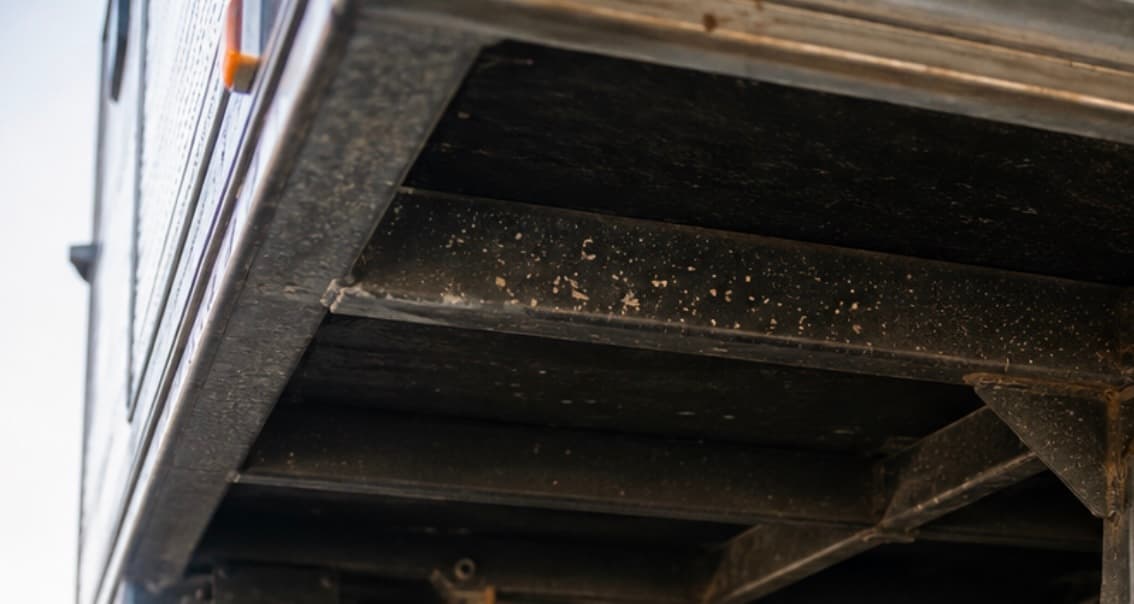
Everything else on a caravan announces itself. A tired interior is right there in the photos; a faded decal greets you from across the yard. The chassis — the steel skeleton the whole van rides on — keeps its condition to itself, down in the shadows where nobody looks without a torch. Which is a pity, because it's the one part of a van where the difference between "perfectly normal" and "serious problem" is largest, and where buyers most often get the two confused.
Some surface rust on a used Australian caravan is close to inevitable. Some cracks are professionally repairable and no reason to panic. And some findings under a van should end the conversation politely on the spot. This guide is about telling them apart.
Five minutes of chassis literacy
You don't need an engineering degree — just names for what you're looking at. Lie down at the front of the van and follow the steel:

The A-frame (drawbar) — the triangle of steel at the front that carries the coupling, handbrake and jockey wheel. It leads every kilometre the van travels and carries the towball load.
The main rails — two long steel members running the length of the van. The backbone.
Cross members — shorter steel sections joining the rails, carrying the floor.
Suspension mounts and hangers — where springs or trailing arms attach to the rails. The hardest-working welds on the van.
Most Australian vans ride on a steel chassis, either painted or hot-dip galvanised — galvanised steel wears a dull grey coat of zinc that sacrifices itself to protect the steel underneath, and it changes what "normal" looks like, which we'll come to.
Rust: what's normal and what isn't
Steel and Australia have a complicated relationship. Coastal air, beach crossings, road salt near the snow, humidity up north — a van that has lived a full life has met moisture, and its chassis will say so. The question is never "is there rust?" It's "what kind, and how deep?"
Normal, and close to cosmetic:
A light dusting of orange surface rust on bare or stone-chipped sections, especially where the paint has been peppered behind the wheels. Surface oxidation on steel is Australian weather doing what it does.
Even, stable discolouration on older painted chassis where the paint has chalked.
On galvanised chassis, dull grey patina and even white storage staining on the zinc — that's the coating working, not failing.
Worth a closer look:
Rust that bubbles the paint from underneath. Bubbling means the corrosion is alive under the coating, not sitting on top of it.
Rust concentrated in seams and joints — where cross members meet rails, around welds, and anywhere two steel faces touch. These traps hold moisture long after the rest of the van has dried.
Rust staining running from inside a boxed chassis rail. Many rails are hollow sections; water that gets in needs drain holes to get out. Streaks from the underside of a rail suggest it's wetter inside than outside.
Anything under a van you know has done serious beach work. Salt water is the accelerant.
Serious:
Flaking rust that comes away in layers, or steel that gives when you press a screwdriver handle against it. That's section loss — the member is getting thinner — and thin steel is weak steel.
Deep rust at the suspension hangers, spring mounts or the A-frame. These are the highest-load points on the chassis; they get the least forgiveness.
Patch plates or fresh underbody paint over an area that's rough and scaly underneath. A neat, documented repair is one thing; thick paint hiding texture is a question that deserves a direct answer.
Cracks: why they happen and where to look
Rust takes years. Cracks are about fatigue — steel that has been flexed enough times at the same point, the way a paperclip fails if you bend it back and forth. Corrugated roads are a fatigue-testing machine, and a heavily loaded van multiplies the effect. That's physics, not poor workmanship — any steel structure worked hard enough for long enough can fatigue, which is why the touring community treats chassis checks as routine.
Cracks start small and grow, and they start at predictable places:
Welds — especially where the A-frame meets the main chassis, and at suspension mounts. A crack often follows the edge of a weld bead.
Corners and holes — anywhere the steel changes shape or has been drilled, stress concentrates.
Behind the coupling — the drawbar carries every bump the tow vehicle passes back.
Look for a fine dark line in the paint, often with a thin rust bleed along it — a hairline crack collects moisture and stains itself for you. Follow every major weld with the torch. If you find a line and aren't sure whether it's a crack or a scratch, that is exactly the finding you hand to a professional rather than adjudicate yourself in a seller's driveway.
And here's the part that surprises people: a cracked chassis is very often repairable. A competent repairer can gouge out a crack, weld it properly and reinforce the area, and vans go back to full-time touring afterwards — the travelling family behind Livin_Like_Kings documented exactly that journey when their own van's chassis cracked on the road and was professionally repaired in Bundaberg, mid-lap, van back in service. Found early and fixed properly, a crack is an event, not an ending.
The distinction that matters on a van you're buying is between a documented professional repair — neat work, a story, ideally an invoice — and an unexplained patch: a plate welded over something you can't see, no paperwork, no story. The first is a van that's been looked after. The second is a van asking you to take its word for it.
The ten-minute underneath check
Wear something you don't mind sacrificing, bring a good torch, and never crawl under a van supported only by a jack — inspect from the edges on your back, or over a pit or hoist if the seller has access to one.
Start at the A-frame. Sight along it from the front for straightness, then check its welds and around the coupling bolts.
Follow each main rail front to back. You're scanning for bubbling, flaking, kinks and fresh-paint patches.
Stop at every suspension mount. Torch on the welds, look for rust bleed lines and cracked paint edges.
Check the water traps. Where cross members meet rails, where dirt has accumulated — packed mud holds moisture against steel for months.
Look for drain holes on boxed rails, and streaking that suggests water lives inside.
Note anything bent. A kinked rail or a drawbar that isn't straight suggests an impact or a heavy grounding in the van's past — that's a professional-opinion finding, every time.
Photograph anything that bothers you. A repairer can tell you a lot from a clear photo before you pay for a full inspection.
Ask the seller the same style of direct, friendly question that works for water damage: "Has the chassis ever been repaired or modified — and is there paperwork?" Vans that have been loved tend to come with stories and receipts. Both are good signs.
Cosmetic, repairable, or walk away?
Cosmetic — price of a used van: surface rust dusting, chalked paint, stone chips, stable patina on galvanising.
Get a professional opinion, then negotiate with open eyes: seam rust, bubbling paint, a suspected hairline crack, an undocumented repair, suspected internal rail moisture. A pre-purchase inspection by someone with a hoist settles all of these — you can find inspection services on VANTURE, and caravan repairers can quote structural work before you commit.
Walk away, or price it as a project with professional numbers in hand: section loss you can flake off in layers, cracked welds at suspension mounts, a bent A-frame or kinked rail with no explanation, patch-plates over scaly steel with no paperwork. None of these are necessarily unfixable — steel is wonderfully repairable — but all of them are jobs for a structural repairer, and the price of that work belongs in your offer, not in your first month of ownership.
The chassis check rewards the buyer who's willing to get their clothes dirty, and it pairs naturally with everything happening above it: our suspension, tyres and brakes technical guide covers the hardware bolted to those rails, the camper trailer inspection guide applies the same thinking to lighter rigs, and the 27-point buyer's checklist puts the whole walk in order. If you're shopping where chassis life is hardest, browse off-road caravans with this guide in your back pocket.
Found a van worth crawling under? Browse used caravans for sale on VANTURE — and before money moves, book a pre-purchase inspection so the steel gets a professional's verdict, not just yours.
Thinking of selling? Sell your caravan on VANTURE — free to list, same price whatever it's worth, and no commission ever.
List your caravan free